
Trail Wallet is but an empty purple shell without the entries that you add to it. Your personal expenditures are the life blood that pumps through its little transistor veins.
The last thing we want to have happen is for that life blood to leak out everywhere. Trail Wallet has an automated backup system that takes a daily snapshot of all these little spending platelets (I think that's probably far enough...) and uploads it to iCloud.
How To Enable Backups
If you are signed in to iCloud on your device (and you have enough free iCloud space), then Trail Wallet will automatically start uploading daily backups in the background. You don't have to do anything.
Trail Wallet stores the last ten backups, and old backups are only erased when a new one is created. This means that if something happens to your iOS device while you are travelling and it takes you a few weeks to get access to another one, Trail Wallet should still show the ten backups from before your iOS device was lost.
Image Backups
Image backups work a bit differently.
Images are still automatically backed up to iCloud when you add an image to an entry, so no worries there.
However, they are stored separately from the data backup to prevent them taking up too much of your iCloud storage—making 10 copies of your entire Trail Wallet image collection would use up a lot of space.
I'd get emails. It would be a whole thing.
When you delete an entry that has an image attached, Trail Wallet marks that image for deletion from iCloud.
If you subsequently restore a backup that still has that image attached to an entry, then the image will no longer be marked for deleting.
After 30 days, of its still marked for deletion, Trail Wallet will then delete the image permanently from iCloud to prevent it taking up space.
Exporting Photos
If you use the images stored in Trail Wallet for any official purposes (e.g. taxes), we recommend you regularly export all of the images.
We do it at the end of the month (I say “we”, but I really mean Erin). She exports all of our expenses and their attached images and stores them with the rest of our accounting.
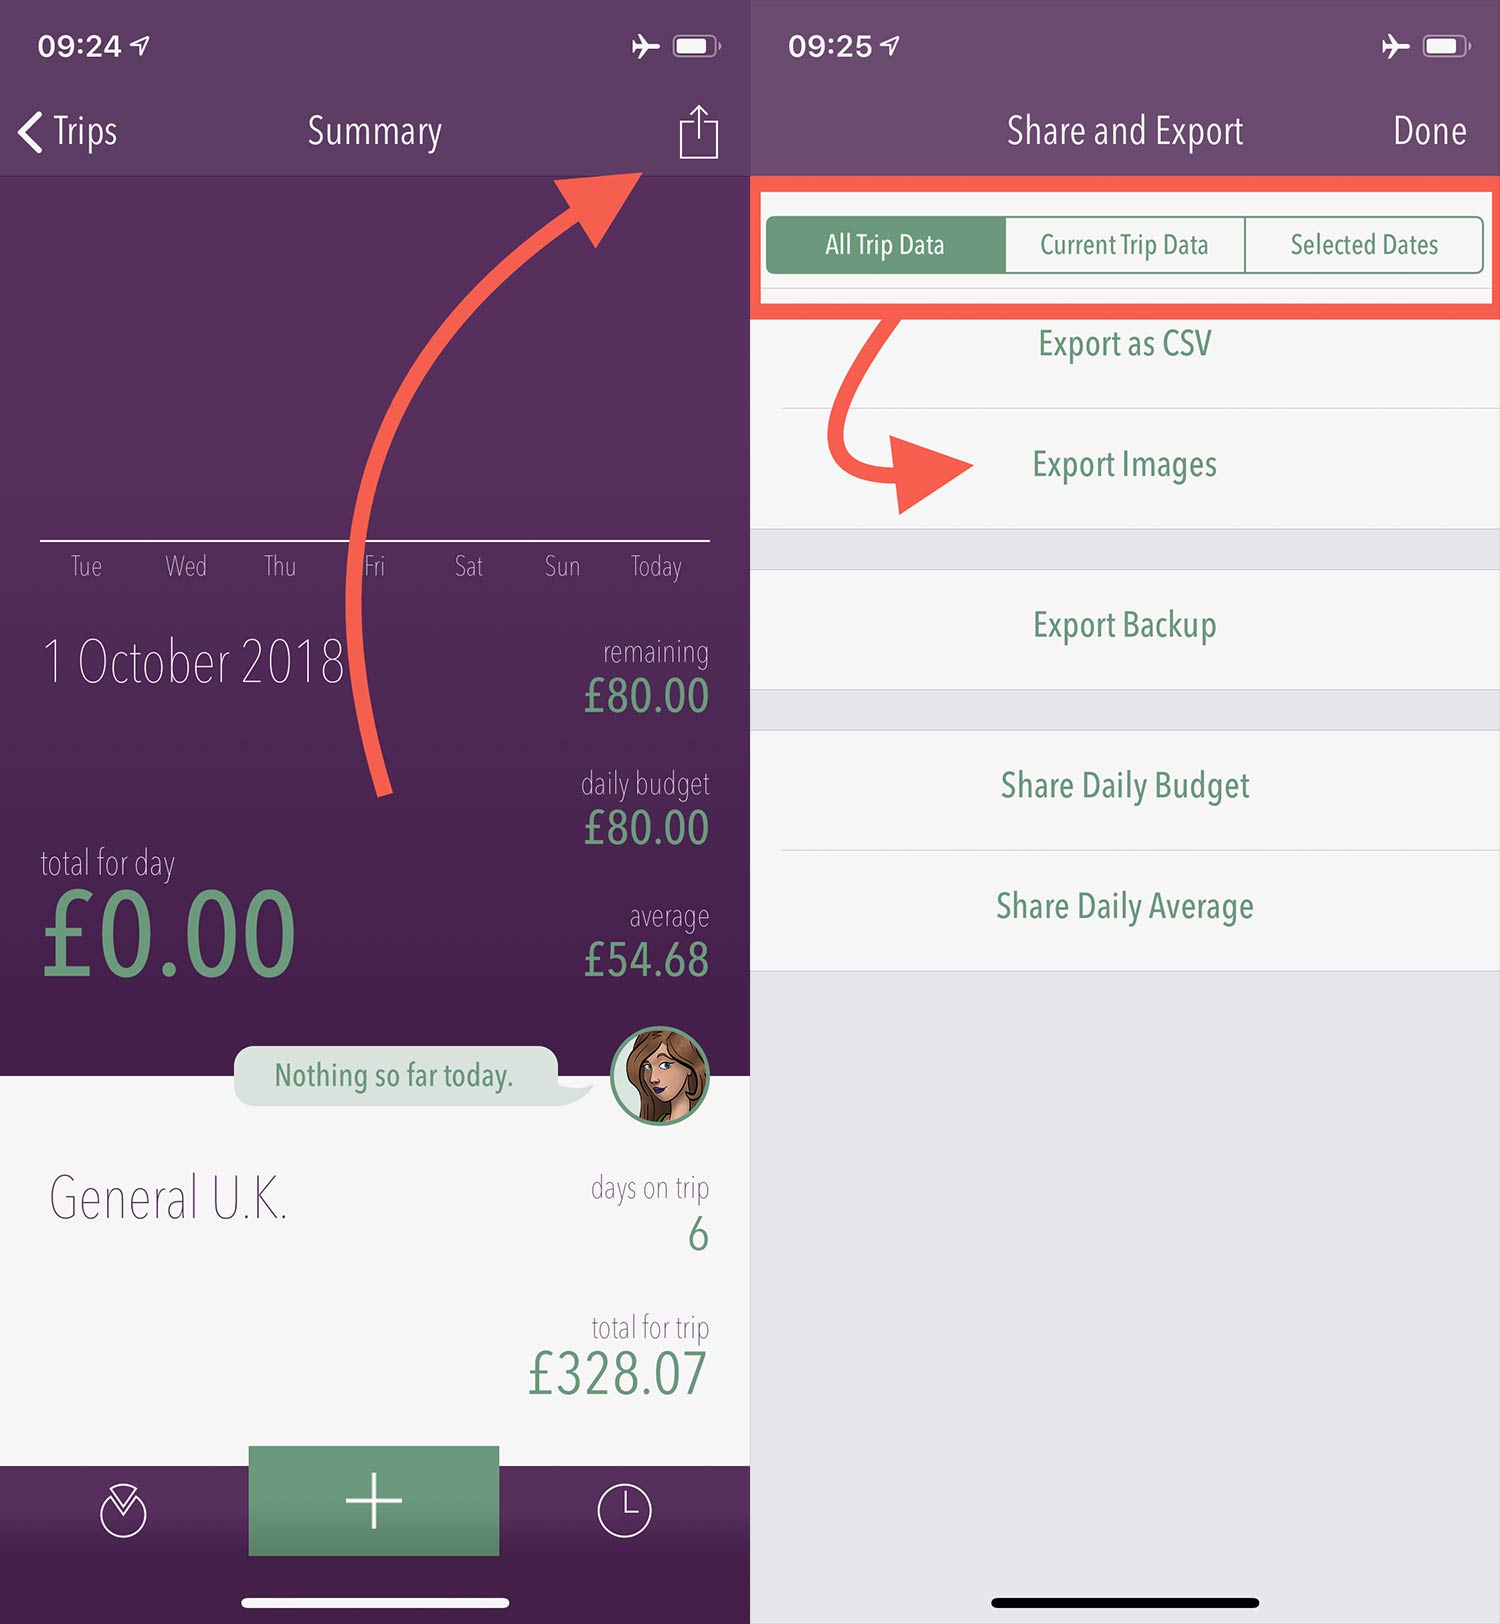
To export images, from the Summary screen, tap the Action icon in the top right (box with the upwards arrow), select the range of data at the top ( All Trip Data, Current Trip Data, or Selected Dates), then tap Export Images.
You can deposit them anywhere that accepts images or Airdrop them to your Mac.
Exporting Individual Files
If you just want to export an individual image (or you want to export the data backup to send to me for debugging, say…), you can do this too.
From the Summary screen, tap the Action button, then tap “Export Backup”. Here you will see a list of all of the backups and images currently stored by Trail Wallet.
You can tap on any single entry in this list and Trail Wallet will give you the option to export it.
Manual Back Up and Restore
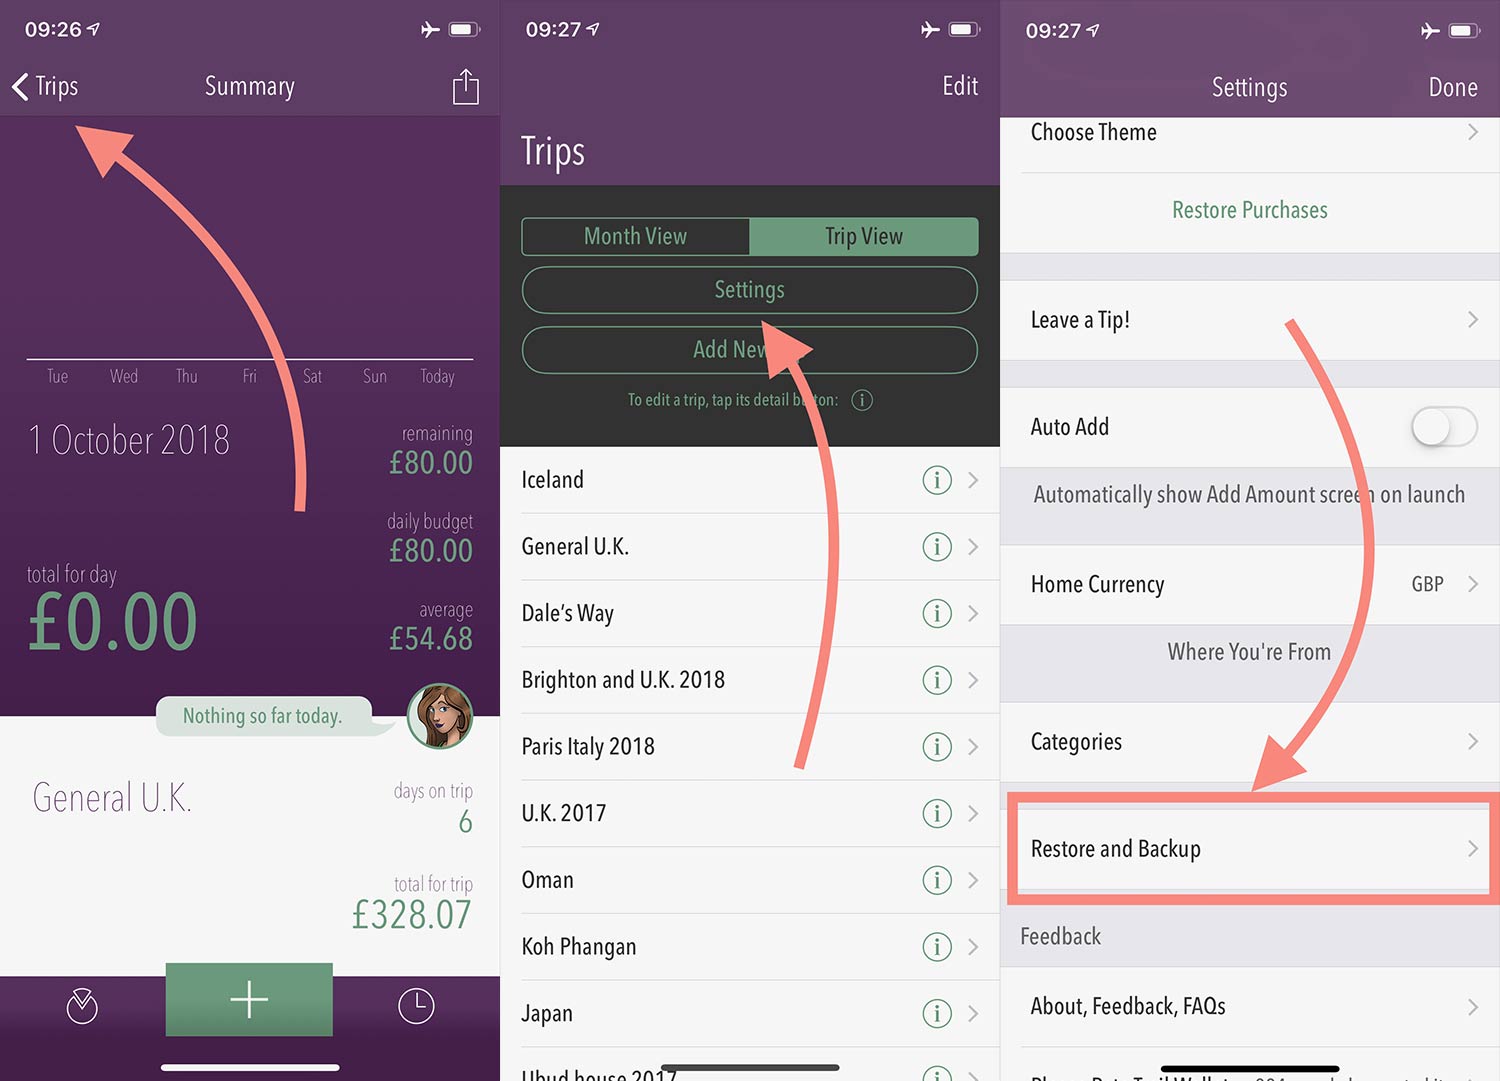
To start a manual backup, or to restore an existing backup, from the Summary screen, tap Trips -> Settings -> Restore and Backup.
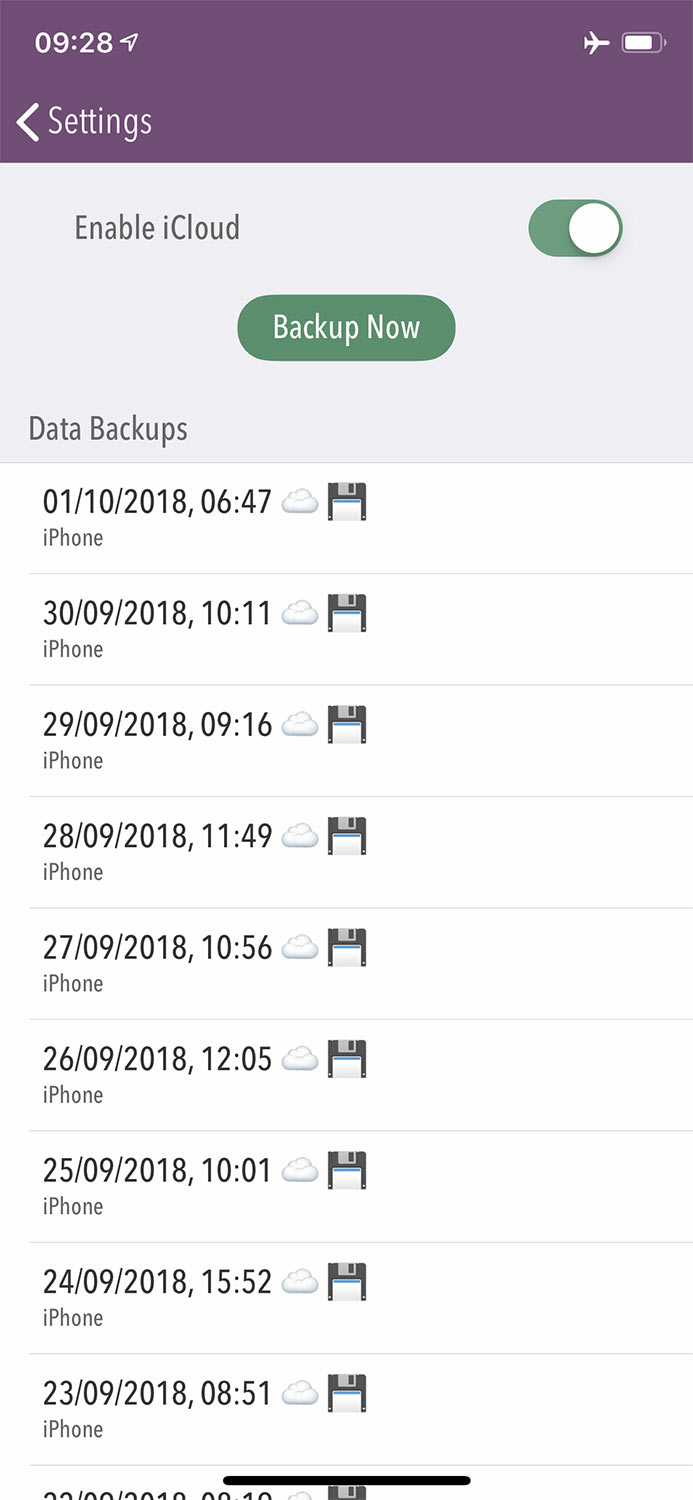
Here you can see if iCloud is enabled and get a list of your current backups. The cloud emoji indicates that the backup is safely stored in iCloud. The disk emoji indicates that a local copy is available (i.e. that it is available offline).
Backing Up
Tap Backup Now to initiate a backup immediately. As soon as the backup is complete, Trail Wallet will attempt to upload it to iCloud.
Trail Wallet will use your mobile data to do this unless you explicitly tell it not to—go to the iOS Settings app -> Trail Wallet and switch off Mobile Data if you don't want Trail Wallet to use your data allowance.
If you don't have internet at the time of backup, then Trail Wallet will mark it for upload and iOS will upload it in the background the next time you are online.
You don't need to be in the app for this to happen.
Restoring
To restore a backup, tap on one of the rows listed under Data Backups.
Warning: restoring a backup will first delete all of the current data on your device.
Trail Wallet will download the backup file from iCloud if needed, then delete all your current data, and replace it with the backup data.
Hopefully you’ll never need to know that all this exists and you can happily use Trail Wallet without thinking about it.
But if something does happen, then it's good to know I've got you covered!
Simon