
Trail Wallet 2.0 introduced trips to make your budgeting burden a breeze. We have tried to make this nifty new feature as simple as possible but in case you haven’t found all that it can do we’ve produced this short guide to help you get the most from it.
1. Basic Set Up
Enabling trips is easy, simply go to settings and tap enable trips and enter a world of organisational nirvana.
But what you might not have realised is this process is entirely reversible. If you decide you don’t like using trips then simply disable trips to return to tracking monthly and it will remember all of your trip data should you wish to re-enable them later.
2. Managing Budgets
Have you saved up a big chunk o’ change for a year-long adventure?
Or is there a daily amount that you’ve allowed yourself to spend (but no more)?
Perhaps you’ve got €600 in total to spend in Greece, but a daily budget of $100 in the US.
However you want to organise things, we’ve got you covered! Each trip can have either a daily budget or a total trip budget—simply select your preferred option on the Add Trip screen and enter the amount you want to spend.

And remember, every traveller is different so don’t let others dictate your budget for you.
3. Managing Currencies
You can now add up to 5 local currencies per trip for all those crazy countries with multiple monetary systems.
To add new currencies, go to Settings->Add/Edit Trips and choose your trip (or set up a new one).

Tapping this cell will show you the list of currencies you already have selected and allow you to add a new one.
You do not need to add your home currency to this list—this will always be available to you as a currency option in the Add Amount screen.
To change your currency when you’re adding new amounts, tap the big button in the top left corner and it’ll cycle through all of the currencies you’ve set up.
4. Moving Amounts Around
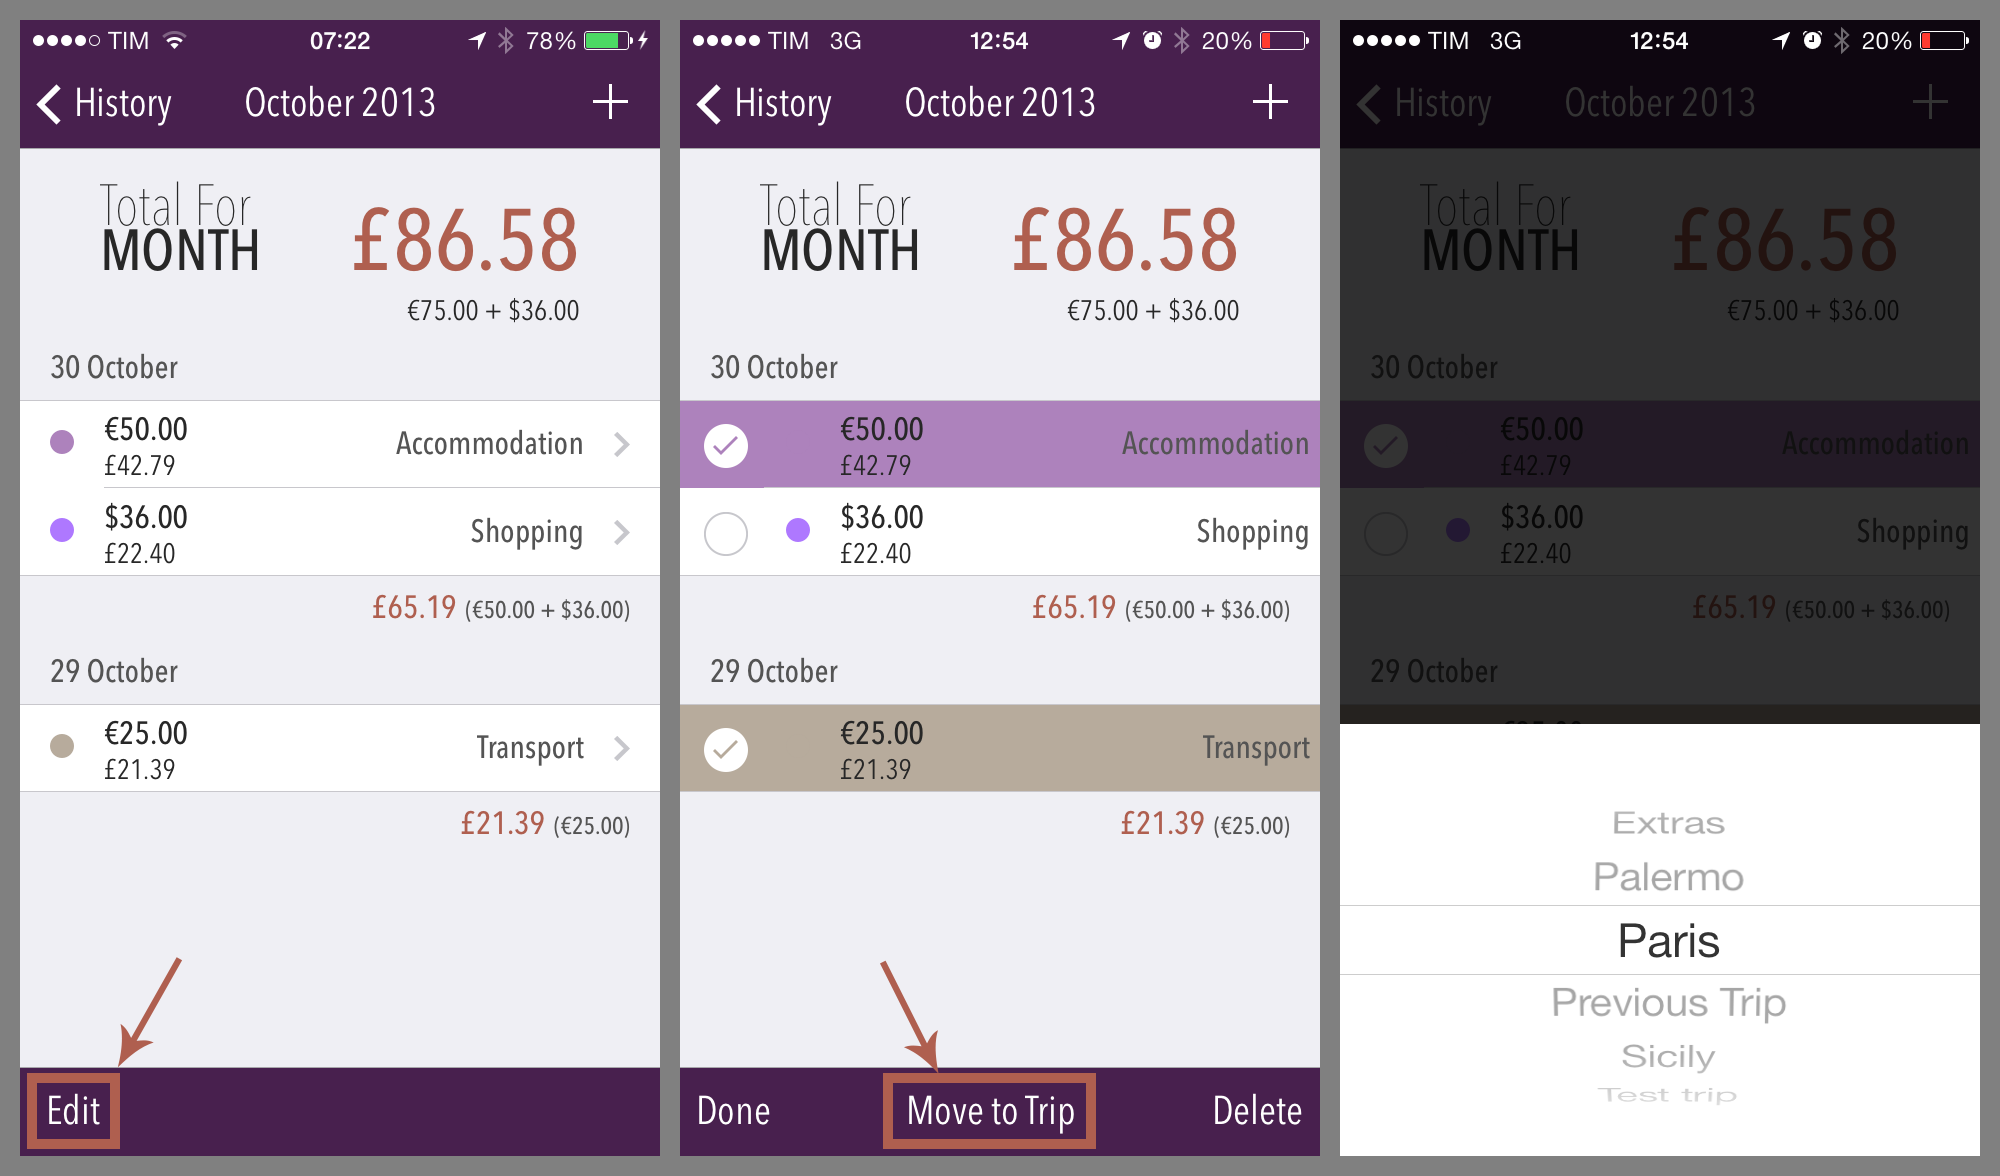
If you need to move items between trips, you can do this easily on the Daily History screen.
- Tap the
Editbutton to enter editing mode: - Highlight the items you want to move then tap
Move To Trip: - Then simply select the name of the trip you want to move the items to, or tap anywhere else to cancel.
5. Open Ended vs Fixed Dates
Trips can either have automatic or fixed start and end dates and which one you choose will slightly change how the summary screen looks.
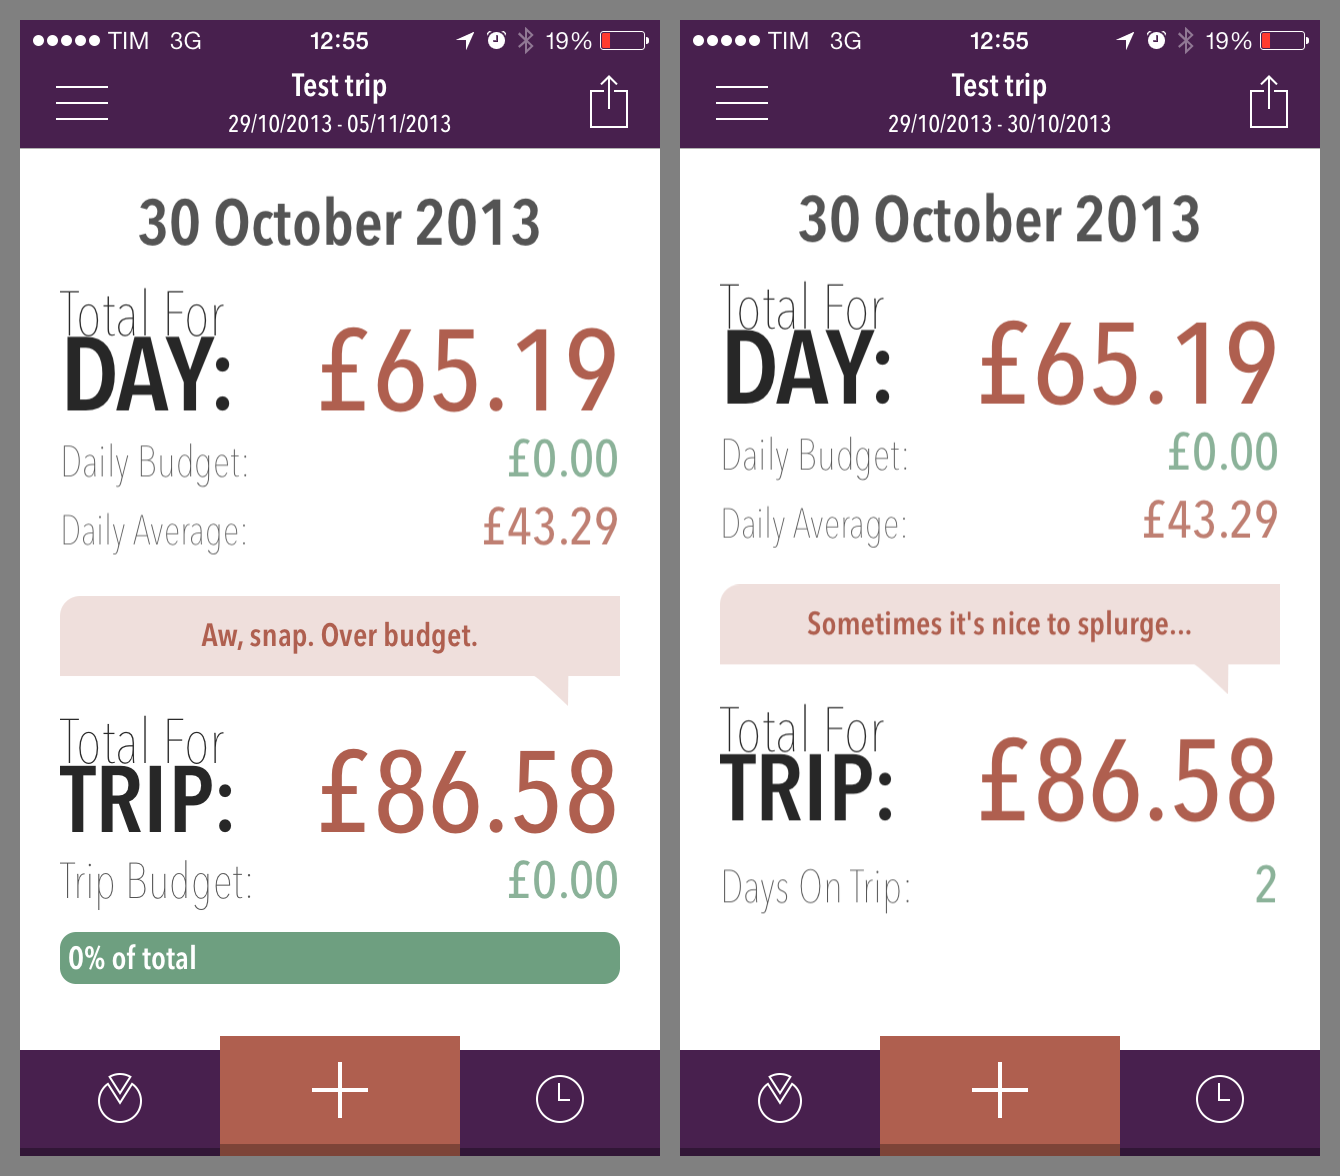
Automatic Start and End dates are calculated based on the first and last amount entered. If you keep entering new amounts on new days, the end date will adjust to take into account the date of the last item entered.
If you choose this option, you’ll see the summary screen on the right. This is because the app will have no idea how long your trip intends to be and so any trip totals it calculates will be meaningless.
If you use a fixed start or end date, you will not be allowed to enter amounts before the fixed start date or after the fixed end date.
6. Deleting Trips
To remove a trip, go to Settings->Add/Edit Trips, then swipe from right to left over the trip you want to delete and tap the delete button that appears.

In order to stop you accidentally deleting all of the items associated with a trip (which could be months worth of data) you do need to make sure that the trip has no items in it before attempting to delete it.
To remove individual items, simply go to the Day History screen, tap Edit, choose the items you want to delete and hit the Delete button.

7. An Extras Trip
Something you might want to consider is setting up a trip with automatic dates called Extras or Big Expenses where you can put one-off items with large price tags.
This allows you to use the app to keep track of expenses like plane tickets, base jumps, or new MacBook Pros without these big, one-off expenses interfering with your budgets and averages.
Get In Touch!
We have a free mailing list that features updates and announcements, as well as links to information on making the most of Trail Wallet.
It’s low volume, no more than two a month, and you can unsubscribe any time.
And if you need any help with any of this, you can always email us, or write to us on Facebook or Twitter, and we’ll do our best to help you out.